

Exports in Aphera are driven by Export Presets. A preset bundles a name, a file destination, a naming pattern, and format options. Set up your presets once in Settings, then export with a single shortcut.
A preset can write into the active project’s folder — useful when each project’s exports should live alongside it — or to a fixed global location, like a Dropbox folder or a shared drive used across every project.
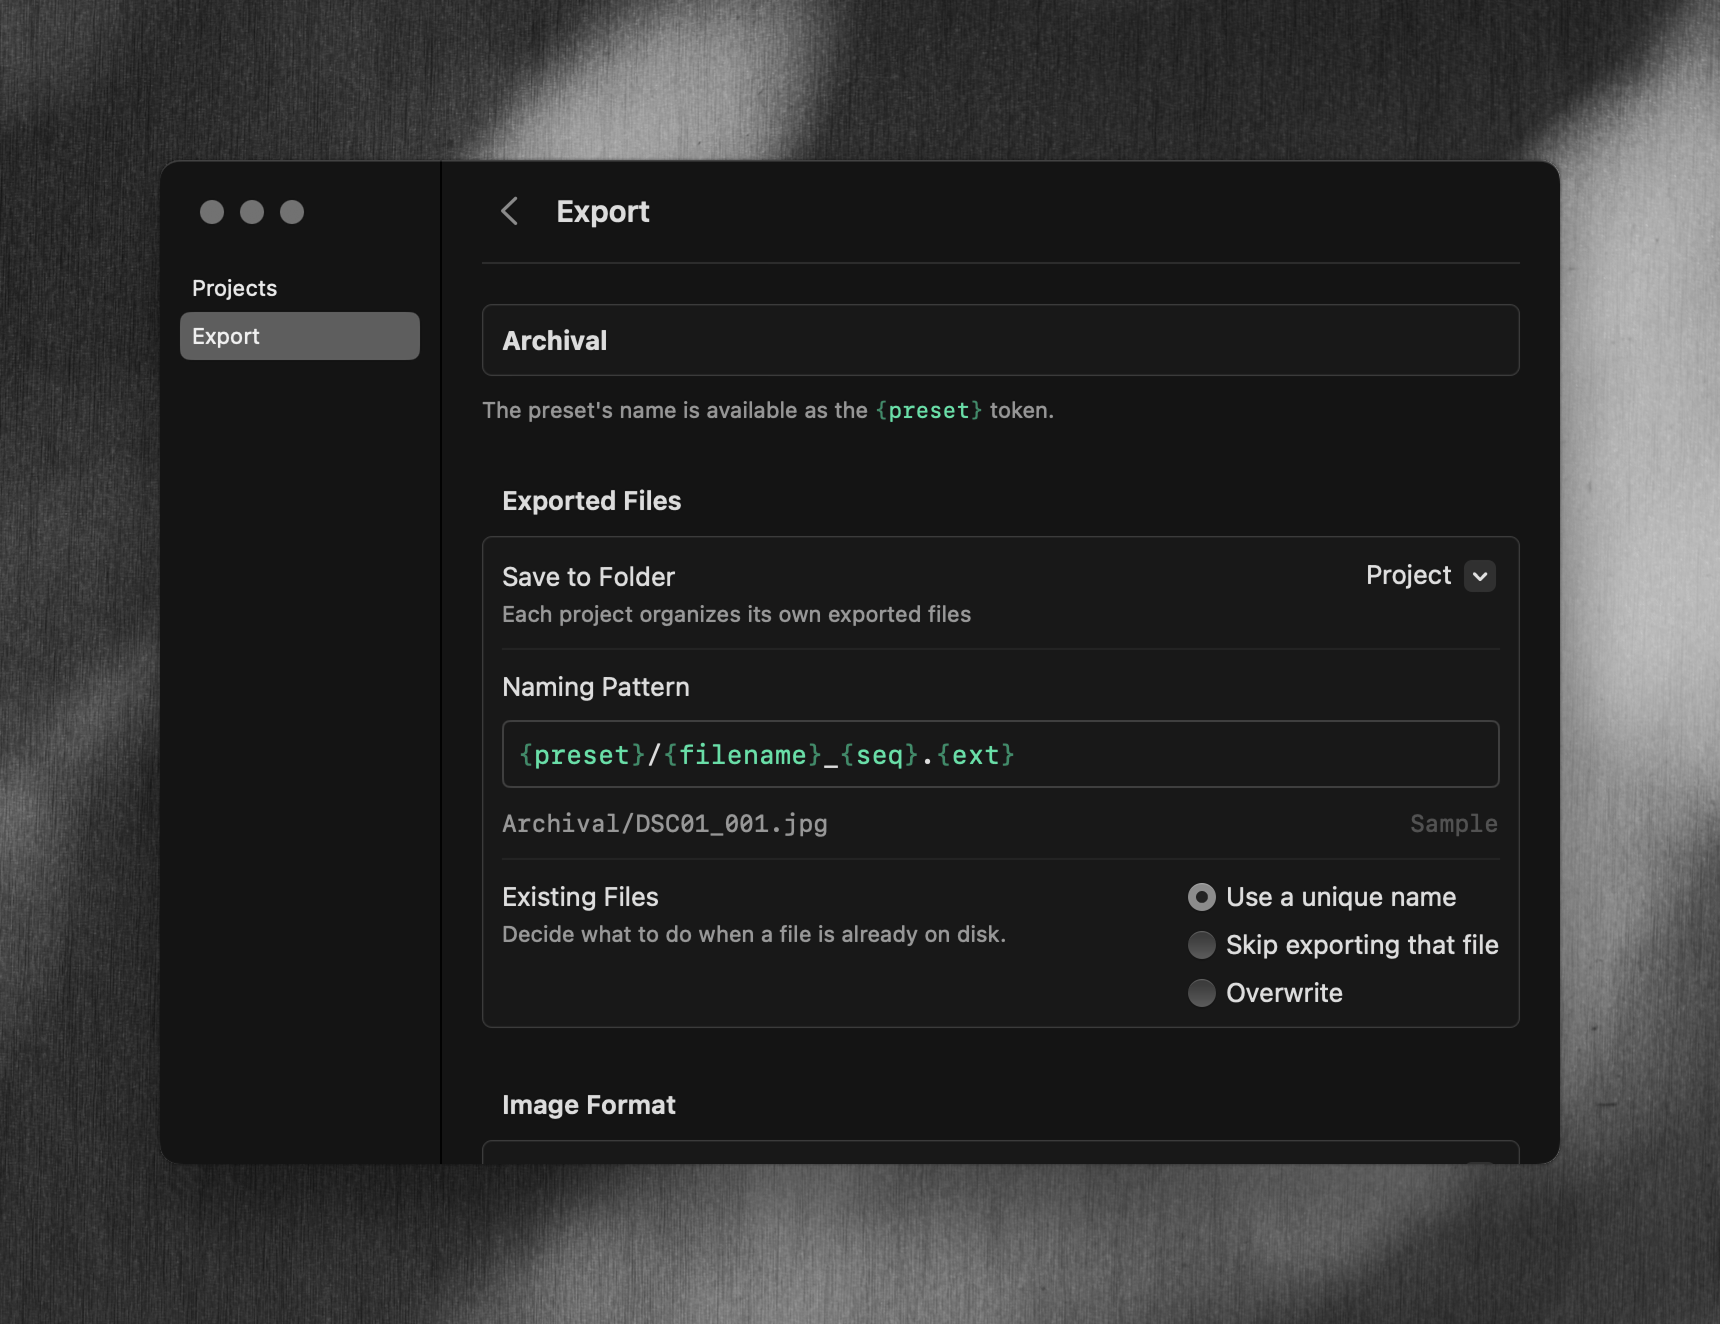
Configuring Presets
Open Settings with Cmd+, and select Exports. Click a preset to edit its file and format settings. Use Add Export Preset to create a new one, or the trash icon on a row (or right-click → Remove) to delete.
Built-in Presets
Aphera ships with three presets you can use as-is or take as starting points. All three write into the active project’s Exports folder by default — change the folder per preset if you’d rather send to a fixed global location.
| Preset | Format | Size | Naming Pattern |
|---|---|---|---|
| Archival | sRGB JPG, full quality | Original | {preset}/{filename}.{ext} |
| Web | sRGB JPG, 95% quality | 3000px long edge | {preset}/{filename}-{seq}.{ext} |
| Social | sRGB PNG | 1080px short edge | {preset}/{filename}-{seq}.{ext} |
File Settings
| Option | Description |
|---|---|
| Folder | Where exports are written. Choose Use Project Folder to write into the project’s exports folder, or Choose Custom Folder to pick a fixed location (e.g. a Dropbox or client delivery folder). |
| Naming Pattern | The path under the folder, built from tokens. |
| Existing Files | What happens when a file already exists. Options are Auto Suffix, Overwrite, and Skip. |
Format Settings
| File Format | Options |
|---|---|
| HEIF | Quality 0–100%, 8-bit |
| HEIF 10-bit | Quality 0–100%, 10-bit |
| JPG | Quality 0–100% |
| PNG | 8-bit or 16-bit |
| TIFF | 8-bit or 16-bit |
| Setting | Options |
|---|---|
| Color Space | sRGB, Display P3 |
| Size | Original, Long Edge (px), Short Edge (px) |
Choosing a Preset
Each project has one active preset. Change it from File > Change export preset, or from the export selector in the project window. The active preset is remembered per project.

If no preset is selected (or you haven’t created one yet), open Settings → Exports to create one.
Running an Export
Cmd+E exports the selected photos using the active preset. The menu item reflects the active preset’s name — for example, Export selected using Web. The shortcut is unavailable when no photos are selected, no preset is active, or the export folder can’t be resolved.
Files are written to the preset’s folder, organized by its naming pattern. Progress appears in the toolbar status area; see Workspace.