

Enter Crop mode with K or via Photo > Crop. The mode displays the photo with the active tool’s overlay and that tool’s controls at the bottom of the window.
A row of tool buttons runs along the bottom edge. Click a button to switch tools. From left to right:
| Tool | Function |
|---|---|
| Aspect Ratio | Set crop ratio and adjust the crop rectangle. Covered below. |
| Straighten | Level the image with a guide or an exact angle. See Straighten. |
| Vertical Perspective | Correct converging verticals using two guide lines. See Perspective. |
| Horizontal Perspective | Correct converging horizontals using two guide lines. See Perspective. |
| Full Perspective | Correct perspective using four corner handles. See Perspective. |
| Manual Perspective | Adjust perspective directly with sliders. See Manual Perspective. |
| Reset All | Reset crop, straighten, and perspective. Disabled when nothing is modified. |
The mode remembers the last-used tool and reopens to it in the next session.
The tools share a single crop and a single set of perspective settings. Switching tools does not discard work done with another tool.
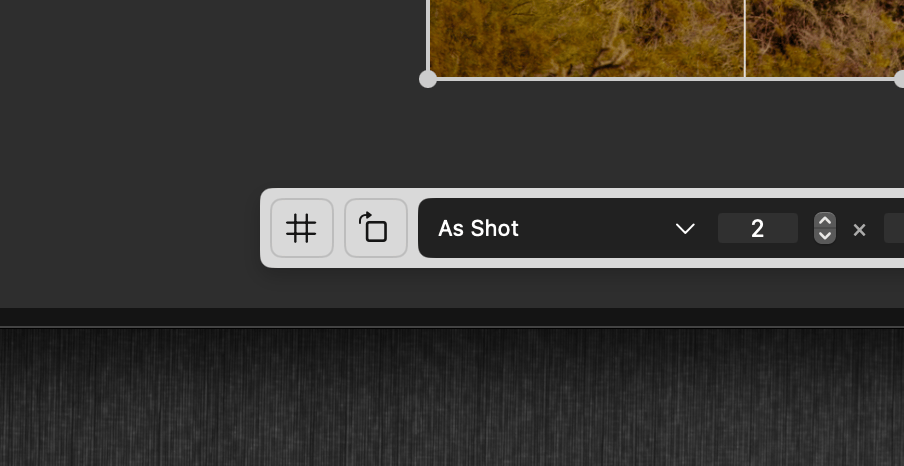
Ratio Options
The ratio picker provides the following options:
| Option | Description |
|---|---|
| As Shot | Original image proportions, no crop applied |
| Custom | Enter a custom width and height ratio |
| Free | Unconstrained crop, any proportions |
| Square | 1:1 |
Standard ratios are available in Portrait and Landscape orientations:
Portrait: 2:3, 3:4, 4:5, 9:16
Landscape: 3:2, 4:3, 5:4, 16:9
When using a Custom ratio, width and height fields appear with steppers for fine adjustment.
When a ratio is selected, click the X button on the ratio to swap its dimensions (e.g. 3:2 landscape becomes 2:3 portrait).
Gestures
All crop adjustments are made via direct manipulation on the photo:
- Move: drag inside the crop area to reposition
- Resize: drag a corner or edge handle to resize the crop. Hold Option while resizing to resize from the center
- Straighten: drag near the corners (outside the crop handles) to rotate
The cursor changes contextually to indicate the available gesture — a hand for moving, a rotation cursor for straightening.
Straighten
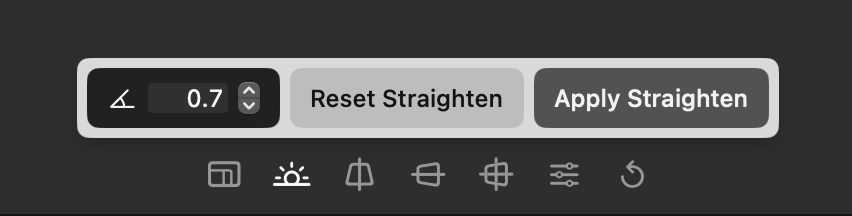
The Straighten tool levels the image. Drag the on-image guide onto a line that should be level — a horizon or a vertical edge — then click Apply Straighten, and Aphera calculates the angle. Until you move the guide, the tool shows a Move Guide to Straighten hint.
For an exact value, a text field displays the current straighten angle with 0.1-degree precision; the stepper increments or decrements by 0.1 degrees.
Reset Straighten clears the straighten angle.
Perspective
The perspective tools correct converging lines and other geometric distortion. There are three guided tools and one manual tool. The guided tools work by placing guides over the photo and applying the result; Aphera then calculates the rotation, lens shift, and shear needed to correct the image.
Vertical Perspective
Corrects converging verticals (for example, building edges that lean inward). Two guide lines appear, one on the left and one on the right. Drag each line onto a feature that should be vertical.
Horizontal Perspective
Corrects converging horizontals. Two guide lines appear, one along the top and one along the bottom. Drag each line onto a feature that should be horizontal.
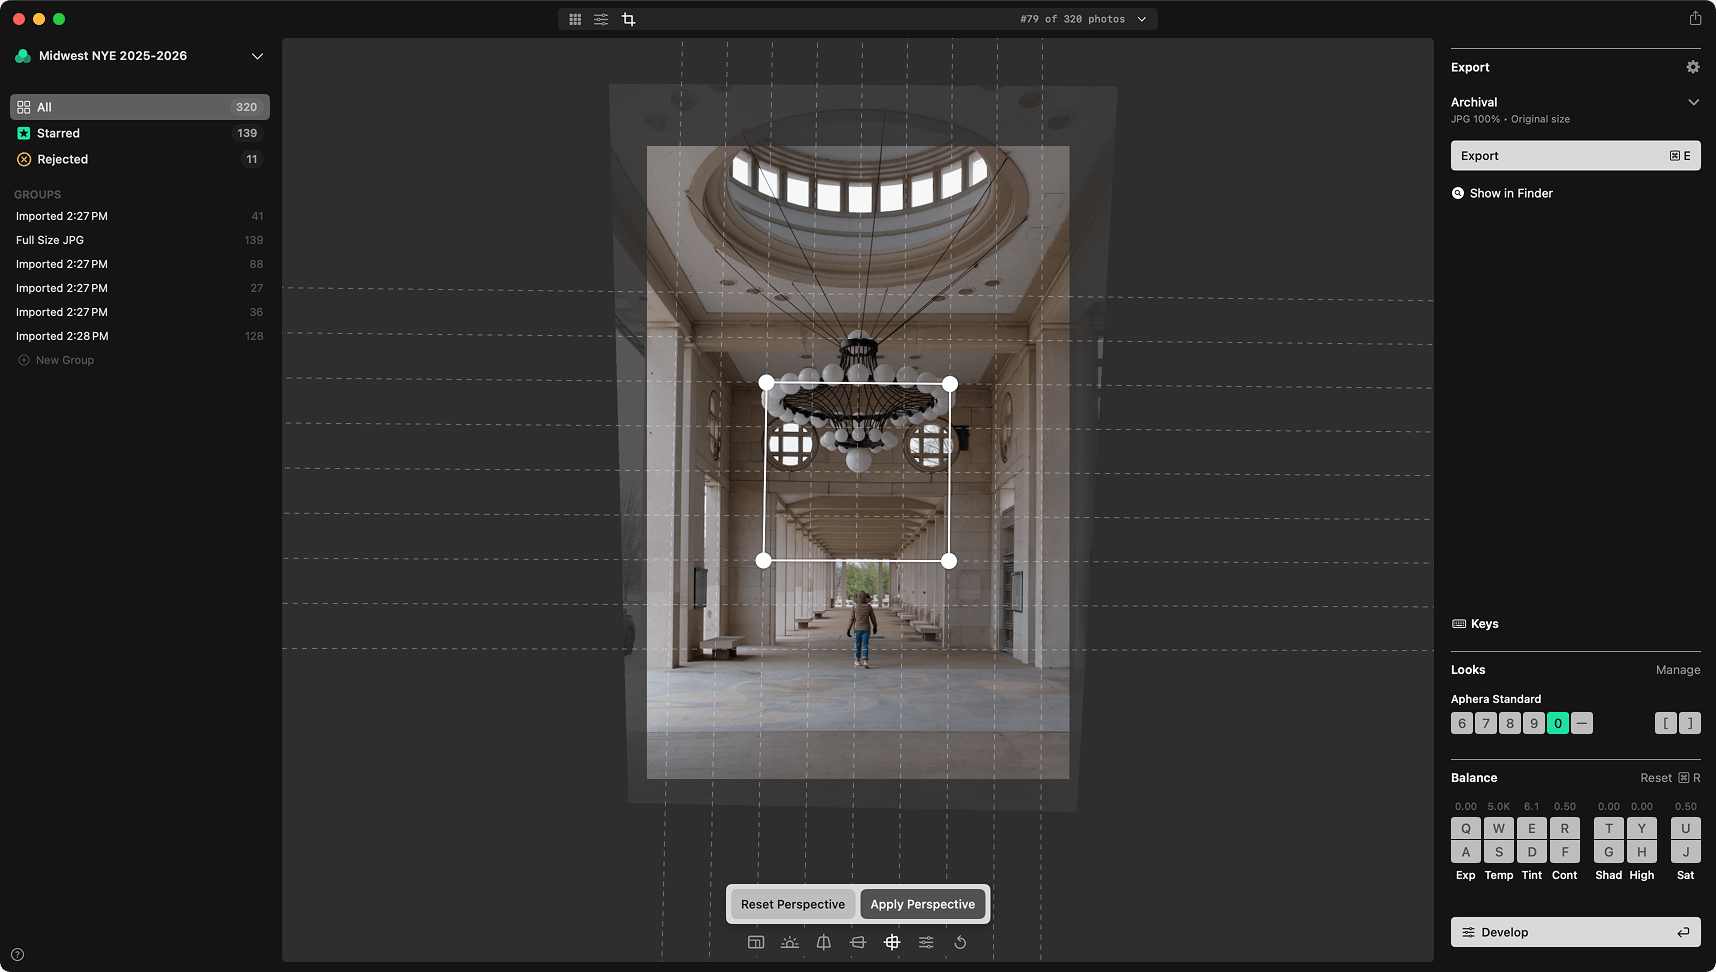
Full Perspective
Corrects perspective in both directions at once. Four corner handles appear. Position them on the corners of a feature that should be a rectangle.
Applying a Guided Correction
Until you move a guide, the tool shows a hint (for example, Move Guides for Full Perspective). Once you move a guide, two buttons appear at the bottom of the window:
- Apply Perspective — calculates the correction and applies it.
- Reset Perspective — clears the perspective correction and returns the guides to their default positions.
Manual Perspective
The Manual Perspective tool adjusts the perspective correction directly with sliders instead of guides:
| Slider | Function |
|---|---|
| Vertical | Vertical lens shift |
| Horizontal | Horizontal lens shift |
| Shear | Shear correction |
| Aspect | Desqueeze (horizontal stretch) |
A Reset Perspective button clears all perspective settings. It is disabled when no perspective correction is applied.
Auto Crop
Auto Crop is a toggle in the editor’s context menu (right-click the crop panel). When on, the crop automatically tracks the perspective correction, keeping the frame filled with image as the perspective changes.
Orientation
The Crop tool includes an orientation button for rotating the image in 90-degree increments, correcting the overall rotation before fine-tuning straighten angle.
Rotation
Rotation rotates the image in 90-degree increments. Available in any mode via the Photo menu.
| Shortcut | Action |
|---|---|
| Cmd+] | Rotate Right (clockwise) |
| Cmd+[ | Rotate Left (counter-clockwise) |
Leaving Crop Mode
Crop, straighten, and perspective edits apply live and are saved automatically — there is no separate confirm or cancel step. Use Cmd+Z to undo.
| Shortcut | Action |
|---|---|
| Return or K | Back to Develop or the single-image view |
| Escape | Back to Grid |
| Space | Single-image view |
Resetting Crop
Cmd+R resets the crop when in Crop mode. In other modes, Cmd+R resets Balance.
The editor’s context menu (right-click the crop panel) provides per-part resets:
- Reset All — resets crop, straighten, and perspective.
- Reset Crop — resets the crop rectangle and aspect ratio.
- Reset Straighten — resets the straighten angle.
- Reset Perspective — resets the perspective correction.
Each item is disabled when that part is unmodified.