
Supported Formats
- RAW files — we support most camera manufacturer RAW formats and Adobe DNG
- Image files — JPEG, HEIC, TIFF, PNG, and other common formats supported by macOS
Video files are not supported.
In the app and documentation, we casually refer to non-RAW files as “JPG”. These formats are supported by Aphera but do not benefit from the RAW image formation pipeline.
RAW + JPG Pairs
When a folder contains a RAW file and a JPG with the same name, Aphera imports both and joins them as a single photo with two source files. One file takes the RAW role, the other the SOOC role (straight out of camera — the camera’s own rendering). Files pair only when one of them can fill each role; two files that would both take the same role stay separate photos.
| Extension | Role |
|---|---|
| DNG, CR2, CR3, NEF, ARW, RAF, ORF, RW2 and other camera RAW formats | RAW |
| JPG, JPEG, HEIC, HEIF | SOOC |
| PNG, TIFF, and everything else | Does not pair |
Notes:
- The RAW file is the photo’s active source file, regardless of which file was imported first.
- A third file with the same name cannot take a role that is already filled, so it imports as its own photo.
- Rating, group membership, and rejection belong to the photo, not to the source file.
- Each source file keeps its own adjustments. Editing the photo edits the file that is currently active.
- Import counts and toasts count files, not photos. A batch of 100 pairs is counted as 200 files imported.
To change which file a photo uses, see Source File.
What images look like during import
During import, Aphera uses a black and white preview of the image. This preview gives you enough information to know which photo it is, without biasing your perception of the photograph. Once imported and processed, Aphera renders RAW images with its default settings. We never display the internal JPG preview. This means the image may look different from what you saw on the back of your camera or in other applications. Aphera’s default rendering aims to be a pleasing, neutral place from which to bring the image to life. Apply a Look or adjust the Balance to take it from there.
Import Files
File > Import Files (Cmd+I) opens a file browser to select photos for import.
Drag and Drop
Drag image files onto the sidebar or content area to import them. The drop target sets the destination:
- A group in the sidebar — imports into that group. The row reads Import to group.
- The New Group row — imports into a new group. The row reads Import to New Group.
- The content area — follows the standard import rules below.
Image files (or folders of images) dropped onto the Aphera dock icon import into the frontmost project. If no project is open, Aphera creates a new untitled project to receive them.
Dragging photos from one project onto another project’s window imports the files only. Adjustments are not included.
Paste to Import
Copy files in the Finder, or photos from another Aphera project, then press Cmd+V in a project window to import them. Paste follows the standard import rules below.
Where Imports Go
Importing via copy/paste or drag and drop puts files in the group being viewed. File > Import Files, and imports made with no group in view, follow these rules:
- A folder always makes a group, named after the folder.
- Loose files make a group at five or more photos, named for the time of import — Imported 3:04 PM. A RAW + JPG pair counts as one photo.
- Fewer than five loose photos go into the project without a group.
Aphera does not import a file already in the project. When the import targets a group, it adds those photos to that group. A group the import made for itself takes only the new files.
Import Looks
File > Import Looks… opens a file browser to select .apheralook files for import. You can also drag look files directly into the looks panel. See Looks for details.
Import Batches
Aphera organizes imported files by import batch. The toolbar shows progress while files import, and a toast reports the result:
| Toast | Meaning |
|---|---|
| Imported N files | Files imported without a group. |
| Imported N files · Added N photos to group | Files imported into that group. |
| Added N photos to group | All files were already in the project. The photos were added to that group. |
| Already in group | All files were already in the project and in that group. |
| No new files to import (skipped N) | All files were already in the project. |
| Nothing to import | The drop or selection held no importable files. |
Imports count files; group membership counts photos. A batch of 100 RAW + JPG pairs is counted as 200 files imported and 100 photos added.
Manage Imports
The Manage Imports panel lists every import in the project. Open it from the project status popover with Manage Imports….
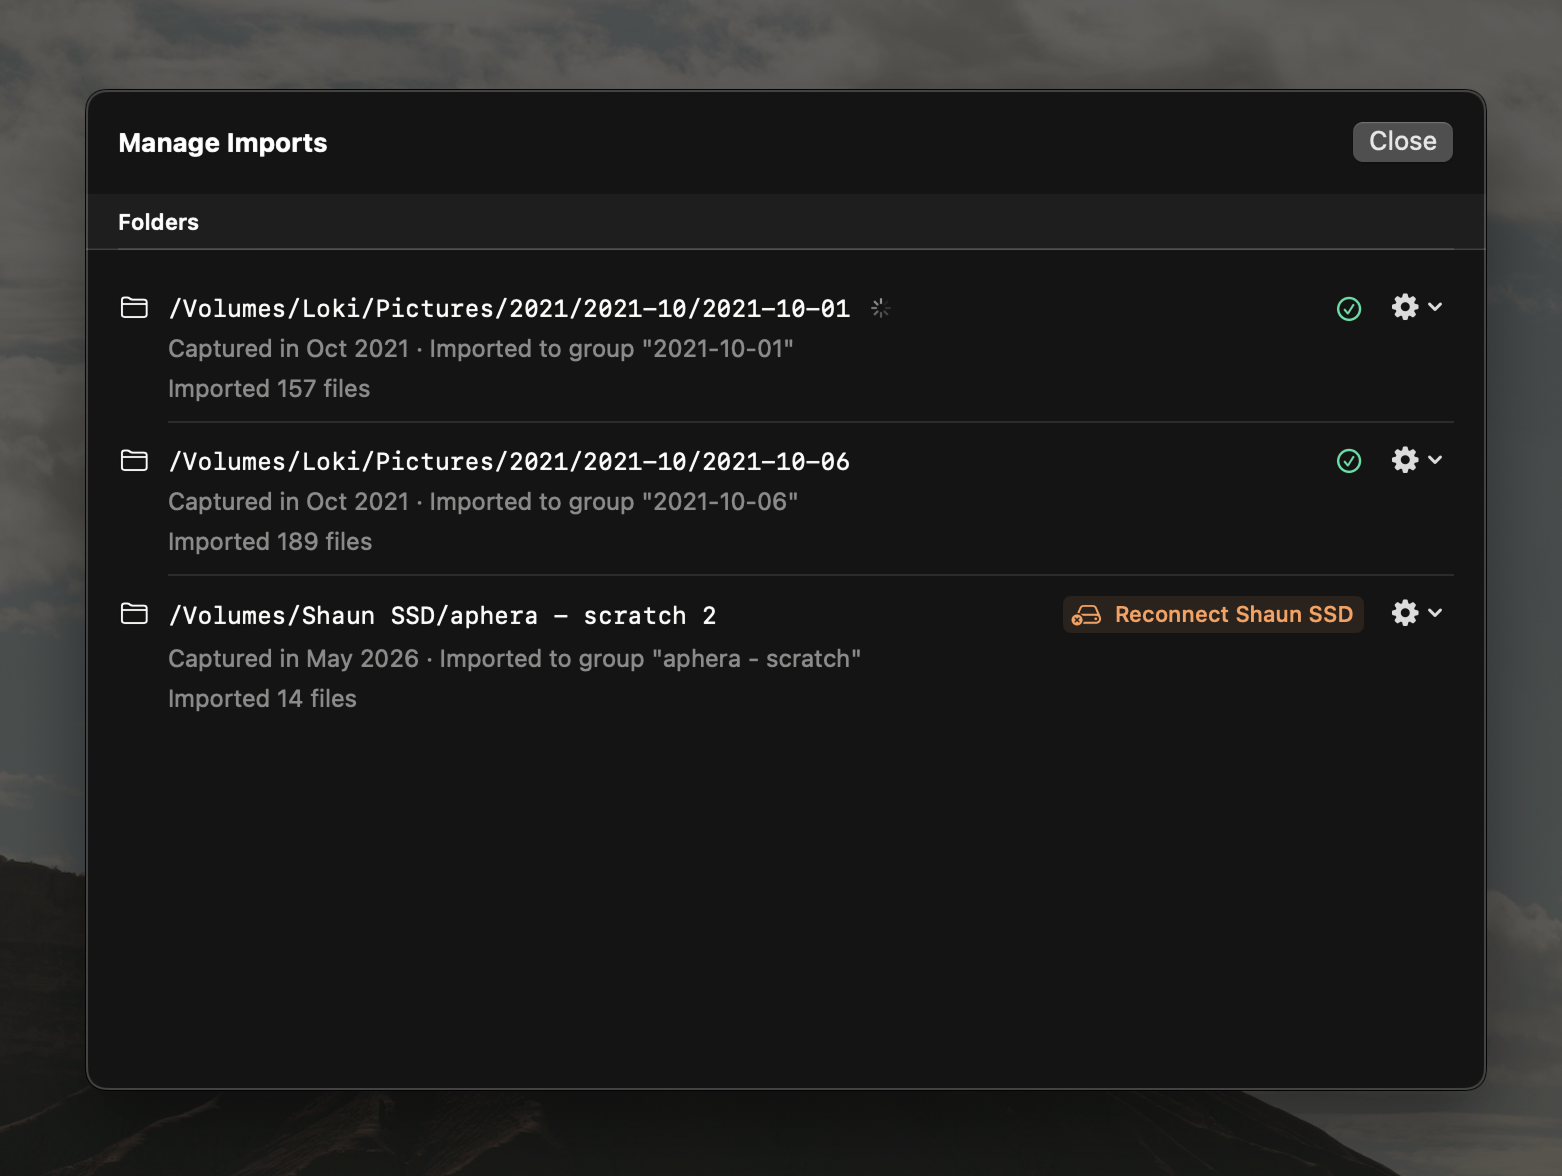
The panel lists imports in two sections, Folders and Files. Each row shows the import’s path, its status, and the file count and capture metadata.
Each row has a gear menu with these actions:
- Show in Finder — reveal the import in the Finder. Disabled when the import cannot be located.
- Locate on Disk… — point Aphera at a new location to relink the import. See below.
- Remove — remove the import and its files from the project. This cannot be undone.
Import Status
Each import shows a status badge:
- Online — all of the import’s files are present.
- N Missing — that many of the import’s files have moved or been deleted.
- Reconnect drive — the files are on a disconnected drive.
- Empty — the import contains no files.
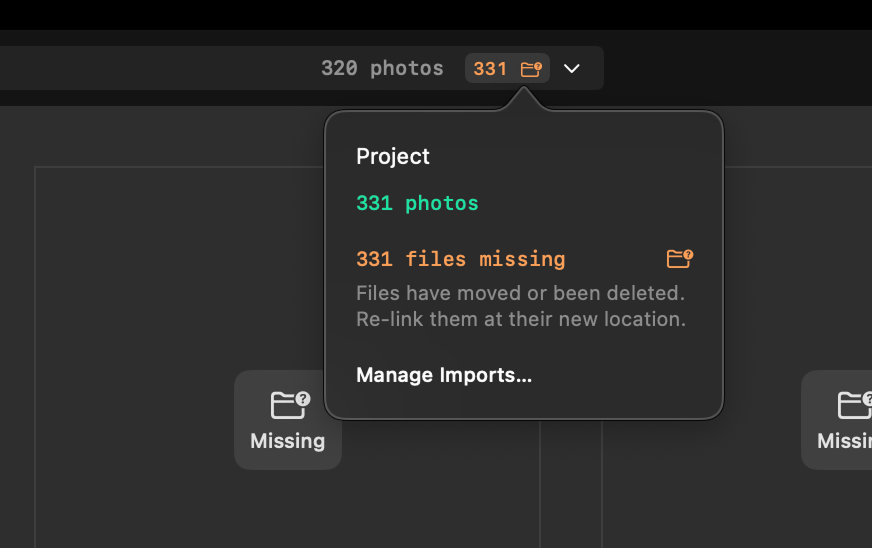
A spinner appears while an import is still in progress; a warning icon marks an import that failed.
Relinking Moved Files
Aphera tracks files by macOS bookmark, so most moves and renames resolve automatically with no action needed. When a file cannot be located this way, Aphera reports it as Missing in the project status. Use Locate on Disk… in the Manage Imports panel to relink it in place:
- Open the gear menu for the missing import and choose Locate on Disk….
- Select the folder where the files now reside.
Aphera matches the expected files at the new location and relinks the import. A result message appears on the row:
- Relinked N source(s) — the import was relinked. The count includes any related imports relinked by the same operation.
- No matching files at that location — the chosen folder did not contain the expected files.
- Relink failed — the operation could not complete.
Relinking does not move or copy files. It updates the project to reference the files at their new location.
Importing from SD Cards
Because Aphera must be able to access your image files, we don’t recommend importing directly from an SD card. SD cards are typically ejected and erased to use again in your camera. First copy files from SD to a location on your hard disk.
Apple Photos
Images inside the Apple Photos library can’t be imported directly. Export them from Photos first (File > Export), then import the exported files.